
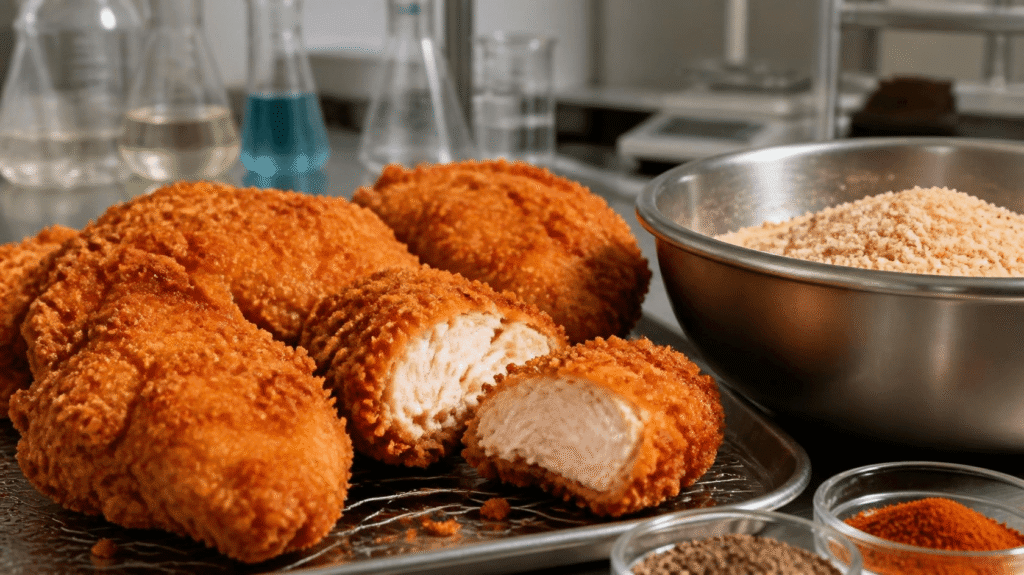
The crunch of that delicious first bite of fried chicken is what your customers notice first. But it’s usually the first thing that fails in a busy kitchen. As the chicken moves from the fryer to holding areas under heat lamps, takeout boxes, delivery bags, or dine-in plates, you may find the coating becomes a limp, soggy disappointment.
To retain the crunch, four factors must work together. Moisture movement, starch behavior, oil flow, and coating structure all determine how long the crust stays crunchy. When these factors work well together, fried chicken stays crunchy from fryer to plate.
Today’s blog explores how water moves from the protein to the crust and how starch forms a structure around the meat. We discuss what makes the coating resist moisture and why oil temperature can make or break your crunch. Continue reading about what you can control, when to test a new system, and how you can measure your results.
Moisture Movement: Water Travels From Wet to Dry
The center of cooked chicken has almost 1.07 to 1.25 grams of water per gram of dry matter. The crust only has 0.15 to 0.59 grams of water per gram of dry matter. Basic physics means moisture moves from wet to dry areas. So, when you fry chicken, moisture will naturally move from the core to the dry crust.
When you hold chicken under a heat lamp, it generates steam. Then the takeout box seals in moisture while the delivery bag provides a warm, moist area. So it’s easy to see how water keeps moving toward the crust under these combined conditions. As a result, water reaches the coating and crunch is lost quickly.
How Starch Behaves
Starch is the cornerstone of a successful breading, as the particles swell and form a stiff network. That’s where the crunch lies.
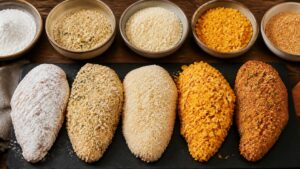
Starches all behave differently. Wheat flour helps the coating stick to the meat. But too much gluten can leave you with a chewy crust instead of a crisp bite. Rice flour and pure starches create a lighter texture that shatters more easily. Corn starch and potato starch form a crisp shell and handle moisture better.
The goal is a coating that’s strong enough to stay in one piece, but with enough tiny gaps for steam to escape during and after frying. A tight and thick mix traps steam inside, and oil soaks in as the food cools. In our experience, a small formula change can slow down the crust softening during holding and travel.
Oil Flow: The Double-Edged Sword
Oil plays two roles with fried chicken. It can either satisfy your patrons’ crunch craving or be the reason why they start staying away.
The surface starts drying the moment the chicken hits the oil. The starch needs to firm up fast so oil doesn’t soak in too deep. If the oil is too cool, the crust stays soft and greasy. If it’s too hot, the outside browns before the coating fully sets, and moisture from inside can soften it later.
A stable fryer temperature is your most practical tool. It won’t replace a great formula, but it will let a good one shine.
Coating Structure: Your Best Defense
A good coating does three jobs really well. It sticks to the chicken, creates a crisp texture, and resists moisture after frying. A strong coating is like a barrier, slowing water movement from the meat into the crust and minimizing how much oil soaks in during and after frying.
Some coatings don’t do this very well. Some formulas crack or separate, making pathways into the center for steam and oil. Others absorb moisture readily after cooking. A good system maintains a consistent, flexible shell that resists both. This is vital for takeout and delivery because the coating must survive in a closed container, and weak coatings fail quickly.
Uneven coverage also hurts crunch retention while thin spots soften first. Thick areas can stay doughy or separate from the meat. Proper adhesion starts with surface preparation and the right sequence of wet and dry stages. The coating needs to grip the chicken so it doesn’t flake off in the fryer or during holding.
What Operators Can Actually Control
You can’t change how water moves through food, but you can control what affects it.
Start with oil temperature. Keep it between 340°F and 350°F, and train staff to check it with a thermometer instead of trusting the dial. Calibrate the gauge every week. Even a 20-degree drop can change how the coating sets.
Don’t overload the fryer. Too many pieces at once will drastically lower the oil temperature and let the coating soak up oil before it can firm up. Batch size matters more than most operators realize.
Keep the coating process consistent. Surface prep, wet stage, dry stage, rest time; every step affects adhesion and structure. If the formula calls for a 90-second rest before frying, don’t skip it; that just creates weak spots.
Make sure your staff knows how long the chicken will remain crisp in your conditions. Track hold times. Run tests with your actual product in the packaging you use. Check the coating for firmness, dryness, and crunch at 15-, 30-, and 45-minute intervals. That’s exactly what your customers experience. If your team knows why these steps matter and understands the science, each person on the line will follow the process.
When to Consider a Coating Change
Let’s say you’ve optimized your system, but the crunch still flops; your coating formula may be the problem.
Signs that it’s time to test and possibly overhaul your system:
- Complaints about soggy chicken increase during peak hours
- Delivery orders get more refunds than dine-in
- Hold times over 20 minutes produce a leathery crust
- Staff can’t maintain consistent oil temperature during rush
- You’ve trained on the process, but texture still varies by shift
Improving coating won’t fix bad frying habits; it just gives you more margin for error. Some systems can hold crunch for 60 to 90 minutes, while others fail at 20 minutes. This difference will show up in customer feedback and repeat orders.
Test one variable at a time. Keep your oil temp, fry time, and process the same. Change only the coating. Compare hold times side by side. Put both in delivery bags. Check at 15, 30, and 45 minutes. The data tells you which system works.
How to Test a New Coating
Don’t guess. Test.
- Pick two coatings: the one you’re using now and a new option. Keep the oil, temperature, fry time, and chicken the same.
- Fry a few batches of each and label them clearly. Put the pieces into the same boxes or bags you use every day. Check them at 15 minutes, then at 30, then at 45.
- Score each one simply: crisp, acceptable, leathery, or soggy. Have a couple of people taste them blind and write down their scores.
- Run the test during a normal busy shift, not when the kitchen is quiet. You need to see how the coating holds up under real pressure.
- Keep notes for about a week. Watch which coating gets fewer complaints, which one still holds through your peak rush, and which one travels better in delivery.
- The winner isn’t always the one that tastes best straight out of the fryer. It’s the one that stays acceptable longest under your actual conditions.
- Once you’ve picked a winner, run it for two full weeks. Track complaints, refunds, and customer feedback. If the numbers improve, you’ve found your system. If they don’t, keep testing.
The Real Cost of a Soggy Bite
Most operators stop troubleshooting at the fryer. They ask whether the coating crunches and whether it looks good. But that’s only half the story.
Texture also affects your margin. A delivery order that arrives soft doesn’t just mean one replacement meal. It often means you lose the customer you already paid to acquire.
The delivery problem
Your delivery customer will complain about a bad experience to friends and family. And they will remember it for much longer than they remember your good service. If the crust flops ten minutes into the delivery route, you could quickly pay for it with lost customers. Having an excellent coating is a necessity; not just for the taste experience but for repeat sit-down business and habitual takeout orders.
The waste calculation
Kitchens run on timers, but real service doesn’t. When a hold stretches from 15 minutes to 30, and the crust still holds, less food goes to waste. In a busy operation, saving even a small amount of chicken from the bin each day adds up over a month.
Kitchen pressure
When a coating doesn’t behave as it should, it’s harder to keep meals consistent. For example, a custom-made coating could handle the small changes that often pop up during a Friday afternoon rush. Whether a batch stays in the fryer a tad too long or the oil temperature dips slightly, the coating does most of the work. The line could spend less time fixing problems and more time moving tickets with the right coating formula.
The cost trade-off
Many operators can’t see why it’s totally worth paying a bit more per pound for a better breading. But if you look at the numbers, you’ll quickly see that not having to refund only two orders a week can make up the difference. Even a modest reduction in complaints removes remakes, delivery credits, and, again, wasted product. A higher price for a better spec coating buys you much more than a bag of breading. It gets you a wider margin of error and improves your bottom line.
Are you running a ghost kitchen, quick-service, or sit-down with delivery? What’s the biggest hold-time problem you’re facing right now?
Are You Ready to Keep the Crunch?
If crunch is failing too fast in your kitchen, the coating system is a good place to start. The mechanics are doable, and the right formula delivers consistency on the plate or door-to-door delivery.
We’ve been creating custom breading systems for 39 years and have helped many operators turn around conditions in real kitchens. We test against your real-life setup and heat lamps; rush times and delivery bags may not be the insurmountable challenges you think. Give us a call, and we can run the numbers and arrange to design and test your ideal formula.